Stunning And Easy Drawing Of A Rose: A Beginner's Guide
Drawing a rose might seem daunting, but with the right techniques, anyone can create stunning artwork. Whether you're a beginner or someone looking to refine your skills, this guide will walk you through every step of the process. Roses are timeless symbols of beauty, love, and elegance, making them a popular choice for artists of all levels. This article will provide you with all the tools and knowledge you need to create an easy yet impressive rose drawing.
Roses have inspired countless artists throughout history, appearing in paintings, sculptures, and even literature. However, the art of drawing a rose doesn't have to be reserved for professionals. With a bit of patience and practice, you can master this skill and create beautiful artwork that reflects your creativity.
This beginner's guide will cover everything from basic techniques to advanced tips, ensuring that by the end, you'll have the confidence to draw a rose that captures its natural beauty. Let's dive in and explore the fascinating world of rose drawing!
Read also:Debby Clarke Belichick The Woman Behind The Nfl Legend
Table of Contents
- Introduction to Drawing a Rose
- Tools and Materials Needed
- Understanding the Anatomy of a Rose
- Basic Sketching Techniques
- Step-by-Step Drawing Guide
- Adding Shading and Details
- Common Mistakes to Avoid
- Inspired by Professional Artists
- Tips for Practicing and Improving
- Conclusion and Next Steps
Introduction to Drawing a Rose
Drawing a rose is not just about replicating its appearance but also capturing its essence. Roses come in various shapes, sizes, and colors, which makes them an exciting subject for artists. In this section, we'll discuss why roses are such a popular choice for beginner artists and how you can approach drawing them with confidence.
Understanding the fundamentals of drawing is crucial before diving into the specifics of roses. This includes learning about proportions, shapes, and shading. By mastering these basics, you'll find it easier to create stunning and easy drawings of a rose that look both realistic and artistic.
Why Choose a Rose for Your Drawing?
- Roses are universally admired for their beauty and elegance.
- They offer a great opportunity to practice curves, textures, and shading.
- Once mastered, drawing roses can be applied to more complex artworks.
Tools and Materials Needed
To create a stunning and easy drawing of a rose, you'll need the right tools and materials. Having the proper supplies will make your drawing experience more enjoyable and efficient. Below is a list of essential items you'll need to get started:
- Pencils (various grades like HB, 2B, 4B)
- Eraser (both kneaded and regular)
- Sketchbook or drawing paper
- Blending tools (stumps or tortillons)
- Reference images of roses
Investing in quality materials will enhance your drawing experience and help you achieve better results. While you don't need to spend a fortune, choosing the right pencils and paper can make a significant difference in the final outcome of your rose drawing.
Understanding the Anatomy of a Rose
Before you start drawing, it's essential to understand the anatomy of a rose. Knowing the different parts of the flower will help you create a more accurate and detailed drawing. A rose consists of several key components, including petals, sepals, leaves, and stem. Each part plays a role in the overall appearance of the flower.
Key Components of a Rose
- Petals: The most prominent feature of a rose, petals come in various shapes and sizes.
- Sepals: Small leaf-like structures at the base of the flower that protect the bud.
- Leaves: Typically arranged in groups of five, leaves add texture and depth to the drawing.
- Stem: The main support structure of the rose, often featuring thorns.
By studying the anatomy of a rose, you'll gain a deeper appreciation for its complexity and beauty, which will translate into your artwork.
Read also:Viral Leak Understanding The Phenomenon And Its Impact On Society
Basic Sketching Techniques
Once you have your materials ready and a basic understanding of rose anatomy, it's time to start sketching. Begin with light, loose lines to establish the overall shape of the rose. This initial sketch will serve as the foundation for your drawing, so take your time to ensure accuracy.
Steps for Basic Sketching
- Start with a circular shape for the center of the rose.
- Add layers of petals around the center, gradually increasing in size.
- Sketch the stem and leaves, paying attention to their proportions.
- Refine your sketch by erasing unnecessary lines and adjusting shapes.
Remember, the key to a successful sketch is patience and practice. Don't be discouraged if your first attempt isn't perfect; every artist starts somewhere.
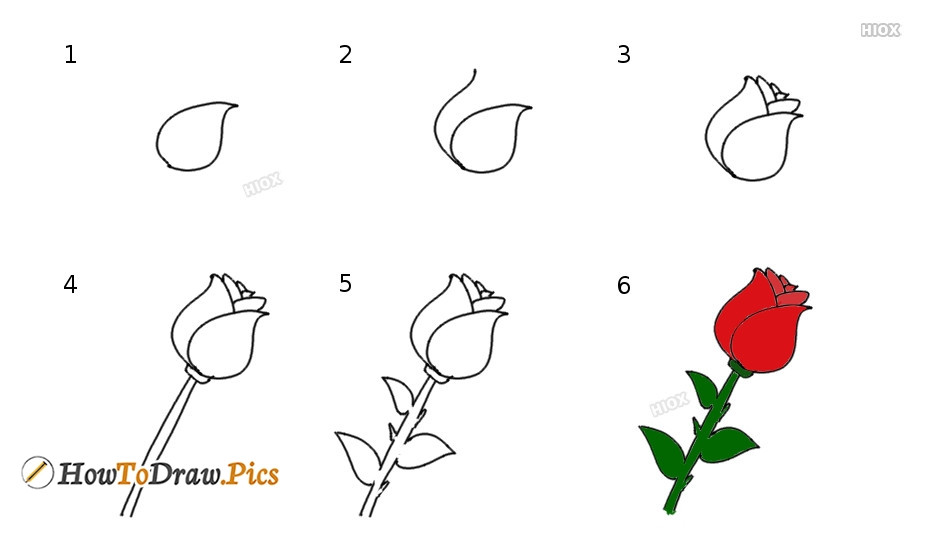
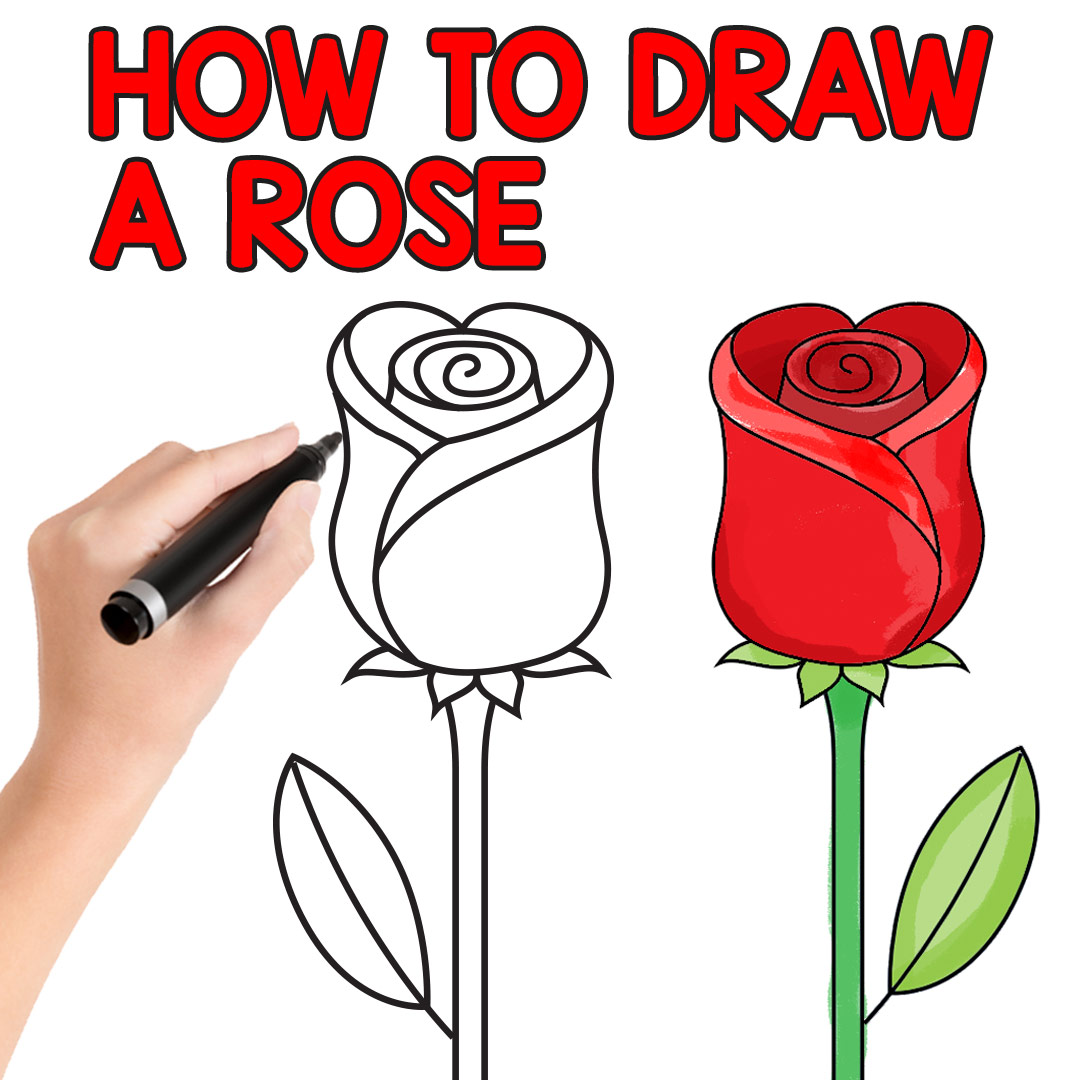
Step-by-Step Drawing Guide
Now that you've completed your basic sketch, it's time to move on to the next phase: refining your drawing. Follow this step-by-step guide to create a stunning and easy drawing of a rose:
Step 1: Outline the Petals
Using your sketch as a guide, carefully outline each petal. Pay attention to their curves and how they overlap, creating a sense of depth and dimension.
Step 2: Define the Stem and Leaves
With the petals in place, focus on the stem and leaves. Add texture to the stem by including thorns and subtle lines to indicate its structure. For the leaves, incorporate veins to make them look more realistic.
Step 3: Refine the Details
Take a moment to refine the details of your drawing. Ensure that each petal is distinct and that the overall shape of the rose is balanced. This step is crucial for achieving a polished final product.
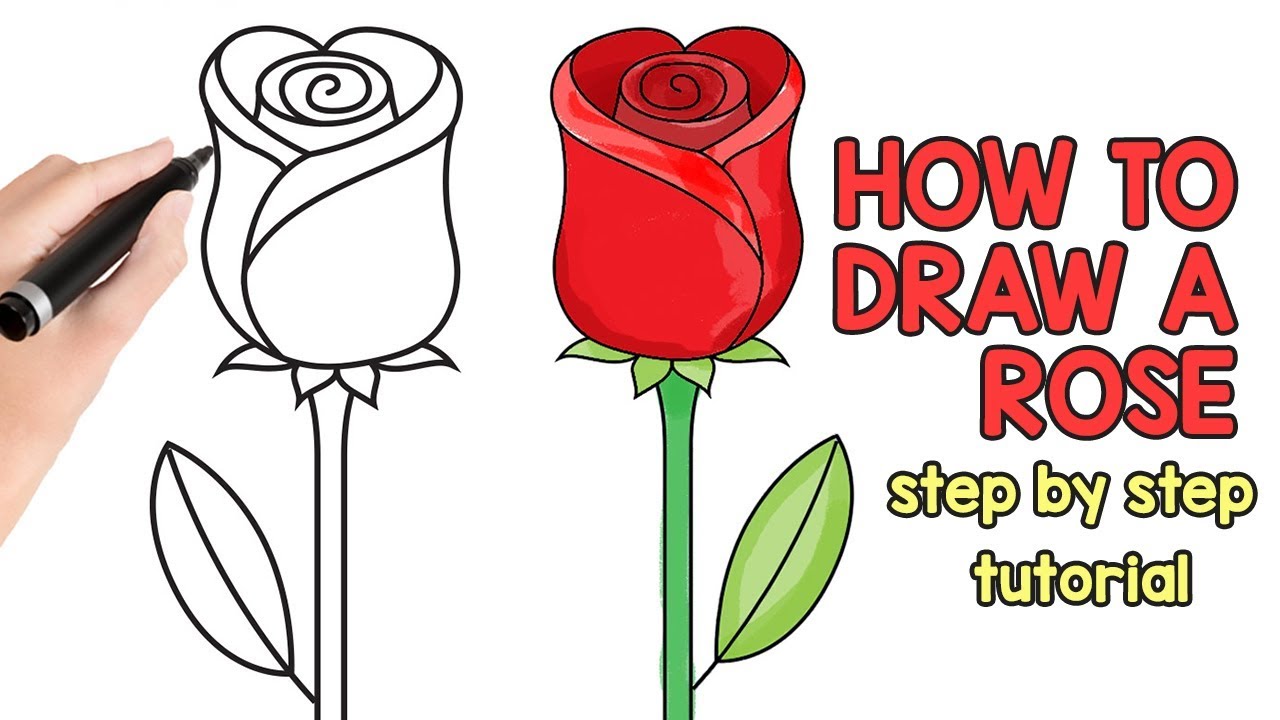
Adding Shading and Details
Shading is what brings your rose drawing to life. By adding shadows and highlights, you can create the illusion of depth and volume. Start by identifying the light source and shading accordingly. Use a range of pencil grades to achieve different levels of darkness.
Tips for Effective Shading
- Use a light touch when applying initial layers of shading.
- Build up layers gradually to avoid harsh transitions.
- Blend shading with tools like stumps or tortillons for a smooth finish.
Adding details like textures on the petals and subtle imperfections will make your rose look more natural and lifelike.
Common Mistakes to Avoid
Even experienced artists make mistakes, but being aware of common pitfalls can help you avoid them. Here are a few mistakes to watch out for when drawing a rose:
- Ignoring proportions: Make sure all parts of the rose are in proportion to each other.
- Overworking the drawing: Resist the urge to add too much detail, which can make the drawing look cluttered.
- Forgetting the light source: Consistency in shading is key to creating a realistic rose.
By keeping these tips in mind, you'll be able to produce a stunning and easy drawing of a rose that reflects your artistic vision.
Inspired by Professional Artists
Looking at the work of professional artists can provide valuable insights and inspiration. Many famous artists have captured the beauty of roses in their artwork, from Vincent van Gogh to Georgia O'Keeffe. Studying their techniques and styles can help you develop your own unique approach to drawing roses.
How to Learn from Professional Artists
- Analyze their use of color, shading, and composition.
- Experiment with different techniques inspired by their work.
- Adapt their methods to suit your personal style.
Remember, while it's helpful to draw inspiration from others, your own creativity is what makes your artwork unique.
Tips for Practicing and Improving
Like any skill, drawing requires practice to improve. Set aside dedicated time each day or week to work on your rose drawings. As you practice, focus on specific areas you'd like to improve, such as shading or petal details.
Ways to Enhance Your Practice
- Experiment with different mediums, such as charcoal or colored pencils.
- Challenge yourself by drawing roses in various poses and lighting conditions.
- Seek feedback from fellow artists or join online art communities.
Consistent practice and a willingness to learn will lead to significant improvements in your rose drawing skills.
Conclusion and Next Steps
Drawing a rose can be both a rewarding and challenging experience. By following this beginner's guide, you've gained the knowledge and techniques needed to create stunning and easy drawings of a rose. Remember, the key to success lies in practice, patience, and perseverance.
We encourage you to take the next step by trying out what you've learned. Share your artwork with others, join online forums, and continue exploring the world of art. And don't forget to leave a comment or share this article if you found it helpful!
Article Recommendations